Audio Recorder

 Guide Tips

  • Part 1. How to Register ApowerShare Audio Recorder
  • Part 2. How to Record Audio from Application on Mac
  • Part 3. How to Edit the Recorded Audio Files
  • Part 4. Record Audio from Other Application (Screenshot)

Part 1. How to Register ApowerShare Audio Recorder


ApowerShare Audio Recorder only offers a free trial for users to record the fist 3 minutes of each audio files. After the free trial expires(15 days), if you want to continue using the software to record full audio/music, you need to register the software to unlock all features. So how to purchase and activate the registered ApowerShare Audio Recorder? Here's the guide you need to follow.

STEP 1. Install and Launch ApowerShare Audio Recorder

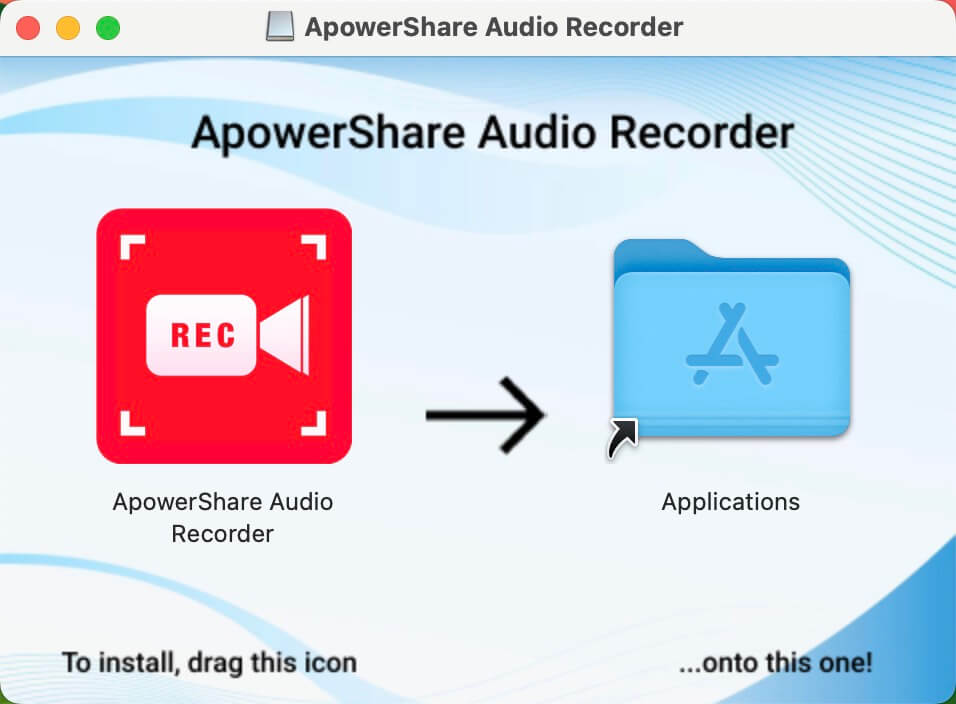
First all all, please click above download button to download the trial version, then double clicking the .DMG installing package, you can see below screenshot, please drag the software icon to the right to completed installing.

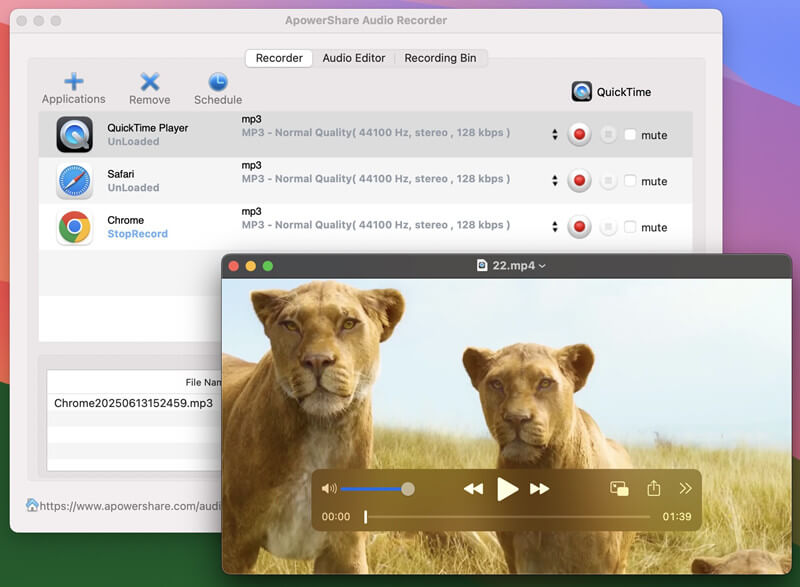
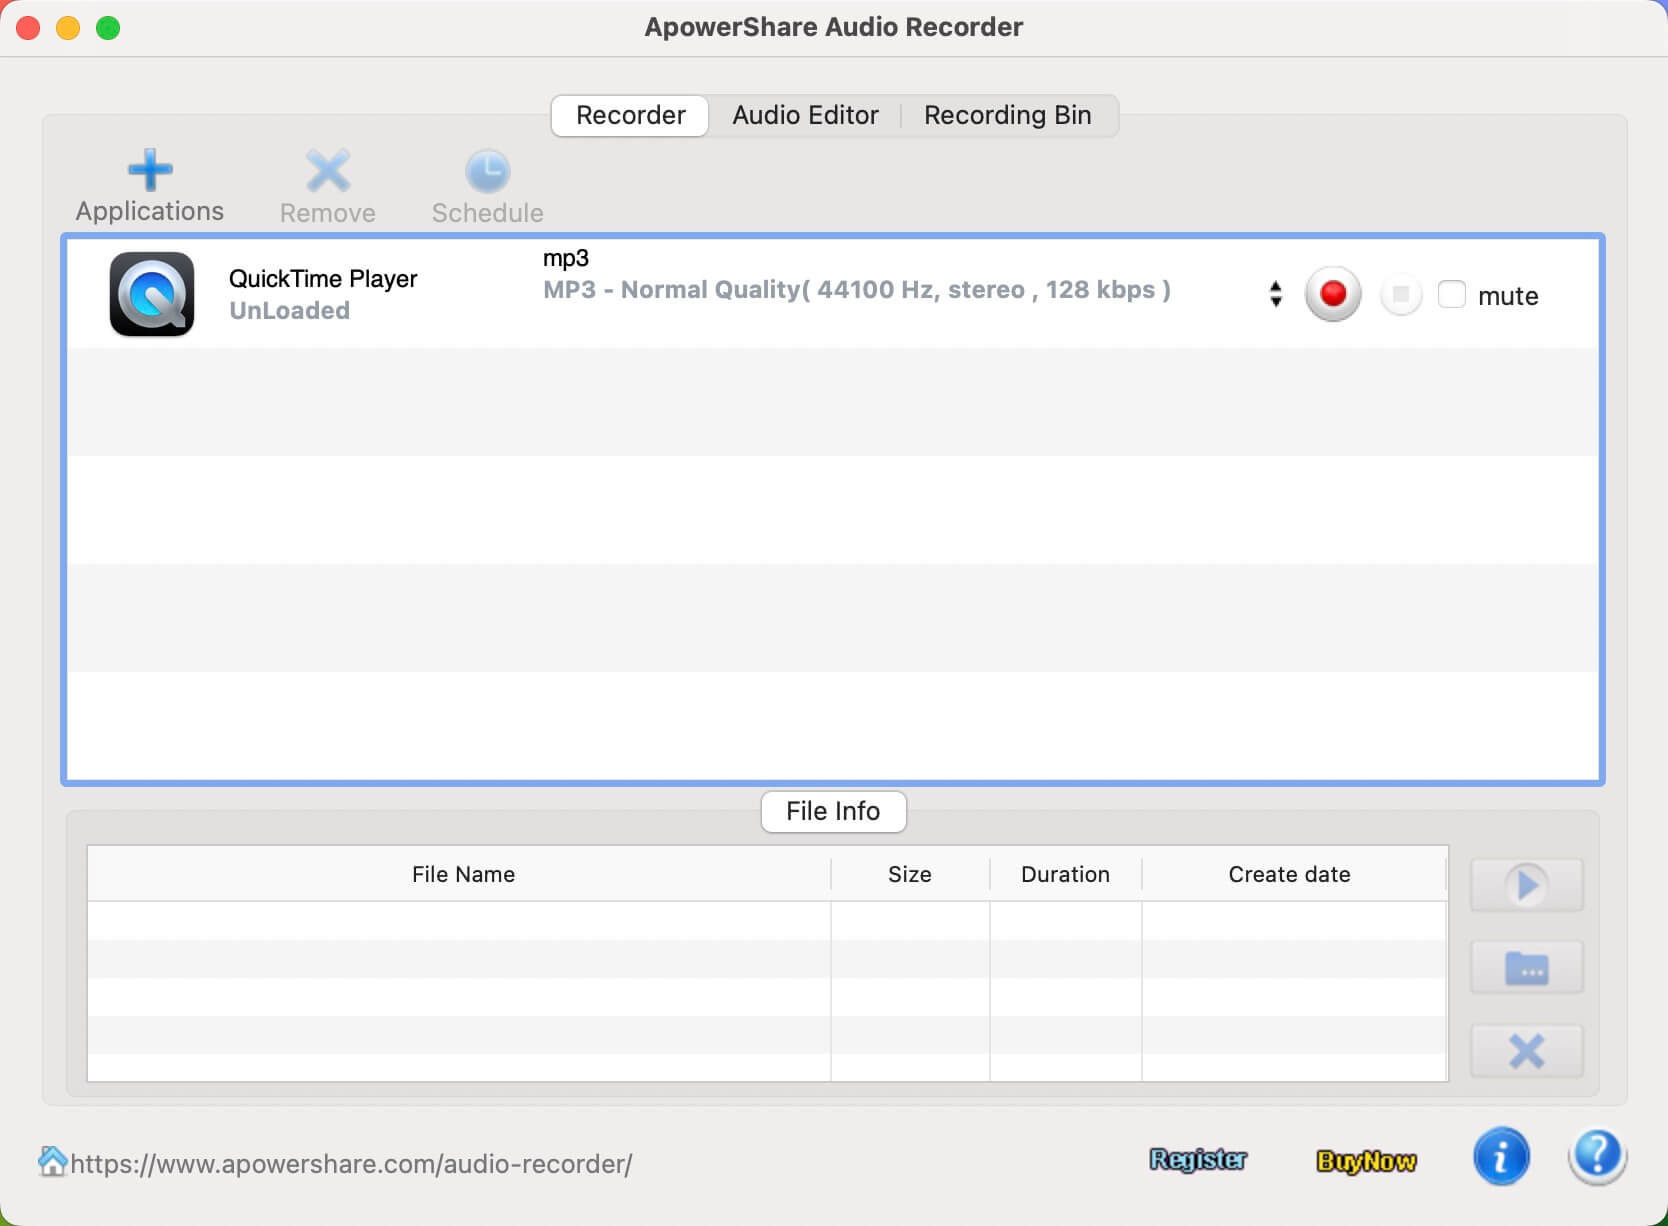
After installing the software finished, please launch it on your Mac, you will get below main interface.

STEP 2. Purchase License for ApowerShare Audio Recorder

When you launch ApowerShare Audio Recorder under a free trial, if you want to unlock all features, please hit "Buy Now" to get a license if you don't have one.

STEP 3. Receive License Key in Email

During the purchase, you are required to enter your email address to receive the license key. Once the purchase completes, open your mail box and check whether you have received it.

STEP 4. Activate ApowerShare Audio Recorder

When you successfully receive the license key, simply navigate back to ApowerShare Audio Recorder and hit to “Register” button on the bottom right corner.

Then put your license code into the bar to register it, the software will be registered successfully.

Part 2. How to Record Audio from Application on Mac


Once you have installed ApowerShare Audio Recorder and consider getting started to record audio from any application on Mac (QuickTime, iTunes, Safari, Firefox, Chrome, Skype, iChat, Music Player, and other application, follow the guide below to process the simple audio/music recording without hassle!

STEP 1. Launch ApowerShare Audio Recorder

Launch the ApowerShare Audio Recorder on Macbook/iMac, you can see below main interface.

STEP 2. Add Application to Record Audio From

Then, please clicking “Application” button to add any app that you want to record audio from, you can add browser such as Safari, Firefox, Chrome; or media player app such as QuickTime, iTunes, VLC; or chat app such as Skype, iChat, FaceTime, Wechat, QQ, etc.

STEP 3. Play Video/Audio in App/Browser and Start Recording

Please open the app that you want to record from. Here, let’s take recording audio from QuickTime as example. Please open a video in QuickTime, then go back to the Audio Recorder and click the left “Record” icon, just clicking “Play” icon on QuickTime Player start to play a video, the Audio Recorder will detect this action and start to record audio automatically from QuickTime.

STEP 4. Stop or End Audio Recording

Duding recording process, you can click the left “Stop” icon to stop recording process, or clicking the right “End” icon to end the whole recording process.

STEP 5. View Audio Recording History

To view all recording history, please click “Recording Bin” menu, you can play them directly with it’s built-in media player. To get the recorded MP3 files, please click “Reveal” button to open the output folder, you will get the MP3 audio files.

Tips: There is a built-in Audio Editor in the software, please clicking “Edit” icon to launch the editing interface.

Part 3. How to Edit the Recorded Audio Files


ApowerShare Audio Recorder also provide a powerful Audio Editor, you can use the audio editing functions to cut and splice audio clips on your Mac in to your own unique track.

STEP 1. Launch Audio Editor

To launch it’s built-in audio editor, please open recording bin interface to view all of your audio recorded history. Please select a recorded audio that you want to edit, then click “Edit” icon to launch the Audio Editor.

STEP 2. Start to Edit Audio

With it’s built-in Audio Editor, you can easily to cut down your recordings by setting the start and end points. You also can cut and splice audio clips in to your own unique track.

Part 4. Record Audio from Other Application (Screenshot)


ApowerShare Audio Recorder support to record any audio from any application on your Mac, it’s very easy to use. With this Mac audio recorder, you can record audio from Chrome, Safari, Firefox, and other browser, so you can play music or video online via browser, then use our software to grab audio clips from your favorite videos on sites such as YouTube and Vimeo on Mac.

Record audio from Chrome

Record audio while playing a video

Record audio from QuickTime while playing a video

Record audio while playing a video on Mac

Record and extract audio from video